Creating the File
Now that there is a partial road map, the first thing we need to do is create the file.
Note: When actually creating the graphics for this template, I had a transparent background. However, that didn’t show up in the screen captures for this tutorial, so I went back and added a black background to make it easier to see what I am doing.
First, create a new file with dimensions of 800×600 pixels to match the smallest resolution we’re designing for.
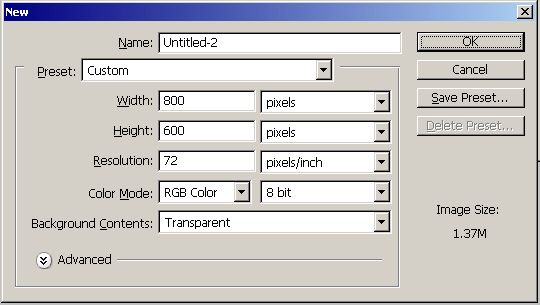
The important numbers here are the width and height. DPI is irrelevant because we’re not going to be printing, and can be set to whatever you want. I just left it at 72 because that’s the default.
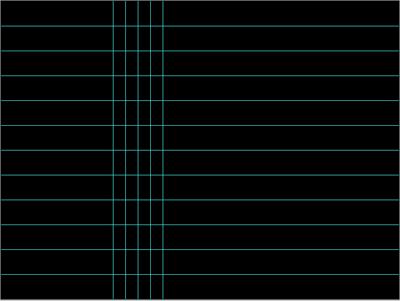
Now we have an image in the correct size. First step is to add a series of guidelines that will help us in lining up our design.
One horizontal guide at 150px and one vertical guide at 225px will serve as edges for our header and left border respectively.
Add horizontal guidelines every 50px starting at 50px (there’s already one at 1500px, so you can skip it this time). Add vertical guidelines every 25px starting at 250px. The grid you create will be used for the curved lines later. Your image should now look like this…
[…] It happens about once a year. I get this urge to redesign one of my sites. And this one with its wavy lines just seemed due. So here is my new design. As you can probably tell I’m on a minimal design kick right now. […]